- Home
- Paint a Landscape
- Paint a Waterfall
Paint a waterfall to add beauty, drama and mystery to our landscape paintings
Welcome to your step-by-step guide on how to paint a waterfall using oil paint.
Painting a waterfall is fun and easy. It only takes three steps to create the beauty and wonder of the waterfall.
It is painted against a colorful landscape that adds more interest and intrigue to the painting.
Let's get started.
 Deep calls to deep in the roar of your waterfalls. Ps 42:7
what do we need to paint a waterfall?
This painting was done on a 16x20 stretched canvas. You're free to choose other sizes based on your preference.
Stretched canvas is recommended for paintings we intend to keep. Canvas boards are good for practice paintings.
My paintings are done with Winsor and Newton Griffin alkyds. They handle just like oil paints, except they dry faster. The techniques are the same as painting with oils.
The brush size depends on the size of the painting surface. This painting used #4 and #6 flats, #2 filbert and a 1/2" angle brush.
The colors are; Lemon Yellow, Indian Yellow, Burnt Sienna, Cadmium Red medium, Alizarin Crimson, Phthalo Blue and Titanium White.
Using a paper palette makes cleanup easy.
Learn more about oil painting materials here.
sketch the painting
It is advisable to do a value sketch on paper before starting a painting. This will help you plot out the light and dark values of the proposed painting. Values form the structure of paintings.
Then, do a simple line sketch directly on the canvas. Use paint that is thinned with a solvent. The thinned paint will dry quickly. A yellow or Burnt Sienna will be easy to paint over later.
Note: if you make a mistake, don't panic! It's easy to rub the line off with a paper towel. If needed use a little solvent to take the line off completely.
 Do a line sketch of the main elements.
You may notice some light pencil lines. The composition is based on the rule of thirds. The head of the waterfall comes out at the juncture of the top third lines.
The rule of thirds is easy composition.
start the waterfall with an underpainting
An underpainting gives us the placement of the elements and their values. But more importantly, we want to see their value relationships.
Squint your eyes and notice the side of the cliff is fairly dark and the base is a darker yet. Notice the area behind the colored trees is darker than the trees.
Values are the backbone of any painting.
 Start with an underpainting.
Thin your paint with solvent, so it will dry quickly. Use colors only, no white paint at this stage.
Use a flat brush and roughly lay in a thin coat of the colors.
Don't worry about getting this perfect - just scrub on the colors for coverage. I actually used the flat side of the brush to cover the area faster.
Cover the entire canvas with the underpainting.
pull out the waterfall
Once the painting is laid out, highlight the waterfall.
While the underpainting is still wet, dampen a flat brush with solvent. Turn the brush sideways and pull the underpainting off to reveal the waterfall.
This gives us the placement of the waterfall. It is not necessary to get down to pure white canvas. We just need the placement.
 Pull out the waterfall with a damp brush.
Take a break while the underpainting dries, probably 30 to 60 minutes.
While your underpainting dries, let's learn some basics of
oil painting.
the basics of oil painting
Paint from thin to thick. What does that mean?
The first layers of paint are thinned with a solvent. The paint is very "thin". The white canvas will show through the paint.
Cover the entire canvas with paint. Just like we did in the underpainting.
The thin paint layer maps out the color and values of the entire painting. This first thin layer dries fast.
Each successive layer of paint is mixed with less solvent or medium.
The last "thick" layer is paint straight from the tube with nothing added.
Paint dark to light.
Always paint the dark colors first. Paint the dark layers, thin. Then paint lighter and thicker, as the painting progresses.
The lightest and whitest colors are painted last. Generally, they will be straight paint with nothing added.
Use these two golden rules to guide you. "Paint from thin to thick" and "Paint dark to light".
This means begin with thinner, darker layers of paint and gradually progress to thicker, lighter paint. Keep this in mind as you work.
paint the background landscape
After your underpainting has dried, start painting the landscape to stage the waterfall.
Paint the far away elements first. Then paint closer and closer into the foreground of the landscape.
This is my favorite way of paint a painting. It certainly is not the only method, but it's a logical way to approach landscape painting.
paint the sky
The sky sets the mood and color tone for your painting.
Paint the entire sky, transitioning from a darker at the top to lighter as you reach the horizon. Then, add in soft, warm white clouds.
To keep your focus on the waterfall, ensure the clouds are softer and darker than the waterfall.
 Paint the sky and soften the clouds.
- Dull a little bit of blue with either red or orange. Then, mix it with your white.
- Paint from the top down, darker at the top and lighter as you paint down. Paint the entire sky. There is no need to leave space for the clouds.
- Mix a warm white by adding a tiny bit of yellow, orange or red to white.
- Paint the top of the clouds first. As you paint down let the white blend into the blue.
- Clean and dry your brush. Use the clean brush and softly blend the clouds into the sky.
We want the clouds softer and darker than the waterfall because they are background. They should not be a distraction from the waterfall.
paint the face of the cliff
Next, paint the cliff face using a flat brush.
Use an up-and-down brush stroke to indicate the direction of the rock formations.
 Brush in the direction of the rocks.
Mix any cool, dark colors. Even though the cliff is mostly in shadow, it will still show different colors. A variation of colors is more interesting.
The dark colors are painted thin. The thin paint makes the next step easier when we paint lighter colors on the dark cliff. This tip works not only when we paint a waterfall, but for any oil painting.
Remember: "thin to thick" and "dark to light".
continue painting the cliff
After this, continue painting the cliff all the way up to the edge of the foliage.
- The base of the cliff darker where it meets the water.
- Paint in some thicker, light colors on top of the thin, dark colors to indicate the rocky texture.
 Day one of painting a waterfall
The underpainting is complete.
This is a good stopping point for those who wish to take a break.
the painting layer
The underpainting laid out the colors and values of the entire painting. We can visualize what the final painting will be like.
Now, it's time to start the final layer of paint.
paint the foliage
Before we paint a waterfall, paint the foliage. Use your artist imagination and think trees while you paint.
Start with the dark foliage colors first, following the lighting direction. Add highlights and gently blend the colors together for a soft, yet detailed effect.
 Paint the darker colors on the foliage.
- Paint the dark foliage colors first.
- The light is from the top, left. So, the foliage is darker on the right.
- Paint with a variety of strokes and shapes.
 Paint the highlight colors of the foliage.
- Paint highlight colors on the left side.
- A variety of colors make it more interesting.
- Gently meld the colors together, so there are not a lot of hard edges.
paint more foliage
Paint some foliage hanging down over the edge of the cliff. Varying the types of foliage gives the viewers more to look at.
 Paint the small foliage hanging over the edge.
The straight lines were painted with a flat, angle brush. A script liner brush would work just as well. The small filbert brush was used for the various small leaves.
Paint a few branches throughout the upper foliage.
The foliage is finished.
 The background is complete.
You may want to lightly indicate some large rocks on the water's edge, left of the falls. Keep them very subdued, so they don't compete with the falls.
Next, we will do the foreground lake and paint a waterfall.
paint the lake water
Start painting the water beneath the waterfall.
Begin with darker shades before
layering in the light colors. Subtly blending the shades together to create a
realistic water's surface.
 Paint the darks of the water.
The yellows plus, Phthalo Blue with some white make a nice variety of turquoise and greens.
Subdue the greens with a bit of red. Mixing green colors
 Lay on some light colors.
Light reflects on water, so layer in some light colors on top of the darks.
Blend the layers together to create a realistic water's surface. (Next image)
 Gently blend the water colors.
After blending you will still see a variety of colors and a variety of darks and lights.
The water remains darker where it is shadowed against the edge of the cliff.
let's paint a waterfall
First, we paint the shadows in the falls, then the highlights and lastly the splash at the bottom of the waterfall.
shadow the waterfall
 Paint the shadow colors.
Make a bluish grey by mixing blue and orange with white. Thin the paint.
Use a small flat brush. Many people use a fan brush to paint a waterfall that will work, too.
Use a very light touch. Position the bristles of the brush vertically, up and down.
Start at the top of the falls. As you stroke down the falls, gradually turn the brush horizontally, so the falls get wider. This an easy way to paint a waterfall.
Notice: you can see the background through the thin paint.
highlight the waterfall
 Paint a waterfall with highlights.
Mix a warm white for the highlights. More about mixing warm colors
This time, do not thin the paint. Remember "thick over thin".
Pull the highlight color with the same light motion from the top of the waterfall, down the left side of the falls.
Don't cover up all of the bluish, shadow part on the right side of the falls.
Paint some bluish shadow colors (not thinned) into the water that is splashing up where the falls hit the lake.
complete the splash
Finish painting the splashing water going out into the lake.
 Paint the splashing water.
- Pull and paint the shadow colors (from the last step) out into the lake water.
- Put some warm highlights on the top of the splash.
- Light reflects on water, so paint a few warm highlights out on the lake water.
- Soften the highlights out in the water to keep the focus on the splash under the waterfall.
how we paint a waterfall
Paint the background things behind and around the waterfall before painting the falls.
- Paint the shadow areas of the falls with a thin shadow color.
- Paint thick highlights on the falls, not covering all of the shadows.
- Paint the splash area at the bottom of falls.
Enjoy painting god's wonderful gift of waterfalls!
Once your painting completely dries, you'll see a stunning waterfall right in the middle of your landscape. Enjoy the beautiful view of your creation.
Remember: This is your painting, and there's no wrong way to create art!
 "Freedom Falls"
more pages for your enjoyment
Mix Skin Color for your portrait paintings
You can paint portraits when you know how to mix skin color. Make the skin colors and paint a child’s portrait with a step-by-step watercolor painting guide.
How to Paint a Beach: Unlock beach painting secrets
Uncover the secrets on how to paint a beach with a comprehensive guide on creating stunning beach art. Steps on how to paint from the sky to the beach foam.
How to Paint Good Art: Proven Tips and Guides
Looking to enhance your painting skills? Understand how to paint good art – from composition, values to color choice. Create diverse and captivating artwork!
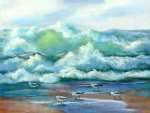
How to Paint a Wave
Join the artist Carol May and learn how to paint a wave step by step with five easy steps for the beginner. Enjoy painting the sea, a marvelous gift from God.


Recent Articles
-
You Can Paint Butterfly Art!
Apr 21, 24 08:31 AM
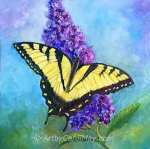 Unlock your creativity and start painting butterfly art. Discover the techniques of painting realistic butterflies. Link to 5 different pages on how to paint butterflies with tips and valuable insight…
 -
Learning to Paint
Mar 29, 24 12:00 PM
 Learning to paint is fun! Millions of people are painting and you can too!
Use these five easy things to jump start your painting journey.
Learning to paint is fun! Millions of people are painting and you can too!
Use these five easy things to jump start your painting journey. -
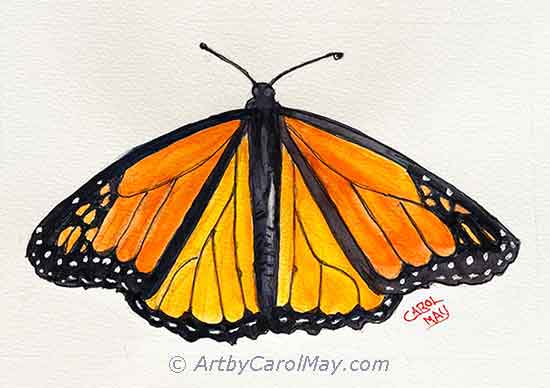
Easy Butterfly Painting: Watercolor Monarch Step-by-Step Tutorial
Mar 25, 24 03:39 PM
 Get creative with an easy butterfly painting tutorial. Discover the joy of drawing and painting a vibrant Monarch Butterfly with simple watercolor techniques.
 -
Overcoming an Artist's Block
Mar 15, 24 12:00 PM
 How to survive an artist's block. All artists can have blocks or delays, but we get over it.
What is an art block? How do we get started painting again?
How to survive an artist's block. All artists can have blocks or delays, but we get over it.
What is an art block? How do we get started painting again?
Recent Articles
-
You Can Paint Butterfly Art!
Unlock your creativity and start painting butterfly art. Discover the techniques of painting realistic butterflies. Link to 5 different pages on how to paint butterflies with tips and valuable insight… -
Learning to Paint
Learning to paint is fun! Millions of people are painting and you can too!
Use these five easy things to jump start your painting journey. -
Easy Butterfly Painting: Watercolor Monarch Step-by-Step Tutorial
Get creative with an easy butterfly painting tutorial. Discover the joy of drawing and painting a vibrant Monarch Butterfly with simple watercolor techniques. -
Overcoming an Artist's Block
How to survive an artist's block. All artists can have blocks or delays, but we get over it.
What is an art block? How do we get started painting again?