- Home
- Painting a Lion
tutorial of painting a lion
Step-by-step instructions for painting a lion with oil paints.
We know the lion as "King of the Jungle". Lions are known for their strength and courage. They are the second largest type of cats on earth.
Actually lions don't normally live in the jungle. They mostly live out on the prairies, the grasslands of Africa. A few lion reside in India.
Maybe we could call tigers the king of the jungle. They are the largest of all cats and they do live in jungles.
Let's get started painting a lion. Follow the three easy steps and create your own lion painting.
 Lions are born to reign.
painting a lion
Use these basic steps to paint your lion with either oil paints or acrylics. Oils and acrylics both are painted from dark to light.
Watercolors are painted the other way around. They are painted from light to dark. Paint a giraffe with watercolor.
What materials will we use?
The longer I paint, the more I like to simplify. It's easier when we only have to keep a few colors in stock. So I have been scaling down my colors to a limited palette.
This lion painting was done with the three primary colors, plus an orange.
- Cadmium Yellow or any yellow of your choice
- Alizarin Crimson or any red for a touch of color on his nose
- Ultramarine Blue or any blue for the sky
- Burnt Sienna is a nice earthy orange, perfect for painting lions.
- Titanium White
This painting is on a 12x12 gallery wrap canvas. Use any size you wish. Even a canvas board is great to practice painting a lion.
A couple of flat brushes worked well for this painting. The exact size of our brushes depends on the size of the canvas.
On this small canvas, I used a #4 for the lion and a #6 for the sky. A small round brush was used for his eyes.
#1 - underpaint
We start the lion painting with a thin layer of paint that dries quickly.
Mix a variety of browns with a small amount of solvent. The solvent speeds up the drying time.
Later we will paint over the underpainting without completely covering it. The underpainting colors will provide variety and the shadowed areas.
 Start the underpainting
We mix our dark colors with the colors selected for the current painting. This ensures color harmony throughout the painting.
The best way to get a dark color is to mix complimentary colors. Mixing blue and orange will give a nice variety of browns. Add more blue to get a black.
Paint the darkest brown in the shadowed areas under the cheek mane, under the neck mane, on the left side of the forehead and some areas in the top mane.
Spot out the eyes, mouth and nose. Notice the top line of the nose is not a straight line. Leave some place in the nose to paint red in the detailing step.
Easy corrections
It's easy to make corrections in the thin underpainting.
While underpainting the background, I noticed the chest went out too far to the left. So I cleaned the mistaken chest area off before painting the background.
 A drawing mistake
 Corrected mistake
Make any necessary corrections with solvent on a clean brush. Paint the solvent on the area you wish to remove. It will take several times to stroke the paint away.
Clean the brush between strokes. If necessary, finally wipe the area clean with a dry paper towel or rag.
underpaint the sky
The sky is darker at the top. It gets lighter toward the horizon.
 Underpaint the sky
Mix a muted blue for the sky. Mute the blue by adding a tiny bit of its compliment. A muted blue makes the sky look more natural.
Lighten the sky toward the horizon by adding more solvent the thin the color. A tiny bit of yellow will warm the blue toward the horizon.
We want the sky's underpainting to dry a bit before we finish painting it. So complete the rest of the underpainting while the sky is starting to dry.
underpaint the lion's face
Complete the underpainting with the lion's face and mane.
 Finish the underpainting
Now is the time for any corrections on the drawing or composition.
All the areas of the canvas are covered and we get a good sense of what the finished painting will look like. This photo was taken before painting a light color around the eyes. (Next photo)
#2 - painting
Now we get to paint. The paint will be thicker, not thinned with solvent. Learn more about how to oil paint.
The underpainting laid out the colors and composition. This makes the painting part easy, because the drawing, colors, values, etc. have all been decided.
 Paint the sky.
Start by painting the sky around the lion. We want the sky finished because parts of the lion's mane will extend out over the sky.
The sky's underpainting should have dried partway while we were underpainting the face. It laid out the color and values of the sky. Now we paint white into the sky.
- Start at the top using criss-cross stokes to mix white paint (no solvent) into the underpainting colors.
- The sky will be lighter at the top right (the light source) and darker toward the left. It will get lighter and lighter toward the horizon. Paint the white paint on the entire sky.
- Then clean and dry the brush. Now go back with lighter strokes to blend the paint more evenly. Clean and dry the brush periodically, as necessary.
The sky does not have to be entirely smooth. This is a painting and the viewers enjoy seeing brush strokes and some color variations.
start painting the mane
Painting the lion's mane is fun!
 Painting the mane
Paint the lion's mane with lighter colors than the underpainting.
Mix some browns with Burnt Sienna and a little blue. Add yellow and a little bit of white to lighten it.
We can mix two or three different versions of the color. Then the mane won't be the same color all over.
Use the edge of a flat brush and stroke in the direction of the hair. Leave the underpainting showing thru in places for shadows and color variations.
The light is coming from the right, so left side of the mane will be darker.
paint the lion's face
This will be the final painting of the face, so use paint without any solvent.
 Paint the lion's face.
Paint the face with pretty much the same colors and values of the underpainting.
The face is more sienna colored toward the top. It gets lighter and more yellow down on the muzzle.
Put a little shadow under the mouth line to indicate it turning in. The hair under the mouth on the chin is white, but in this stage give it a tiny bit of color. Then the white highlights will show up in the final stage.
We will do the pupils of the eyes in the final stage after the yellow is dry. That way the yellow and black won't mix.
paint the body
Paint and texture the body with some lighter brown colors.
 Paint the body
As an artist, the dark body gives a nice contrast to the light colored mane. Every artist has their own way of painting a lion.
You may want to do a yellow body, that's fine, too. They can have quite a variety in appearance.
It's nice to have some good photos for painting a lion. A good place to look for copyright free images is Pixabay.
#3 - detail and finish
The painting is well on its way. We will paint some details and finishing touches on the lion.
 Start detailing the lion.
Look over the painting and see what you want to refine. You may want to touch up and finish different things. Here's what I did.
- Younger lions have shorter manes, but he looked like he had a flat top. So I lengthened and lightened the mane and put the little tuft of hair growing out of the center of the forehead.
- Detail the eyes with dark pupils and light color in the white part under the eyes.
- Add a touch of red in the nose.
- The lion like all cats, have whiskers. Indicate three or four rows of whisker spots. If you want to paint whiskers, use a script liner with a lightly colored white paint.
- More color under the mouth, indicates it curving in.
- Paint more light colors on the body. Lightly touch the flat side of the brush to the canvas for more texture.
- The shadow inside the ear was lightened. It was too dark and attracting attention.
The grass was roughed up with a variety of grassy colors. Details in the grass would draw attention away from the lion, so it is purposely left vague.
check for more final details
Touch-up any final details you see that need adjustments.
 Check for final details.
This is not a list of things for you to paint. It is what I saw in my painting.
You may find different things to adjust. No painting is perfect, so there usually are some final tweaks.
- The left side of the mane was put into shadow.
- The white part under the eyes was subdued.
- The ridge of the snout was straightened.
- Put some white highlights on the chin hair.
- The dark mane behind the ear was lightened.
- Adjusted the front part of the side mane.
- Lightened the mane on the left of the head to make it recede.
Go up to the finished painting.
painting a lion is fun - enjoy!
paint more oils
Oil Painting Supplies
All about oil painting supplies, what do we need to do an oil painting, best paints, brushes, colors, what to paint on, what are alkyd paints, clean up and more
Paint a Waterfall with beauty & drama
Paint a waterfall to add beauty, drama and mystery to our landscape paintings. Add a waterfall to any of your oil paintings, only 3 steps with full instructions
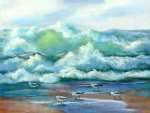
How to Paint a Wave
Join the artist Carol May and learn how to paint a wave step by step with five easy steps for the beginner. Enjoy painting the sea, a marvelous gift from God.
Mix Skin Color for your portrait paintings
You can paint portraits when you know how to mix skin color. Make the skin colors and paint a child’s portrait with a step-by-step watercolor painting guide.


Recent Articles
-
You Can Paint Butterfly Art!
Apr 21, 24 08:31 AM
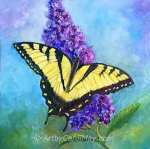 Unlock your creativity and start painting butterfly art. Discover the techniques of painting realistic butterflies. Link to 5 different pages on how to paint butterflies with tips and valuable insight…
 -
Learning to Paint
Mar 29, 24 12:00 PM
 Learning to paint is fun! Millions of people are painting and you can too!
Use these five easy things to jump start your painting journey.
Learning to paint is fun! Millions of people are painting and you can too!
Use these five easy things to jump start your painting journey. -
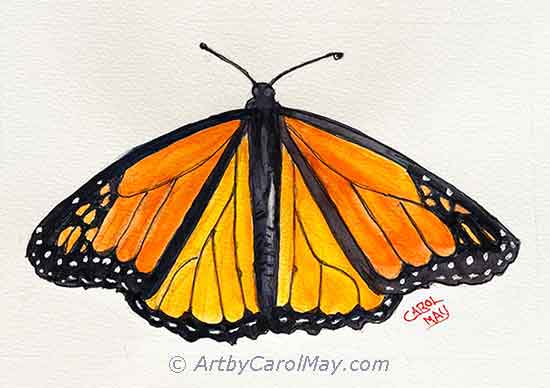
Easy Butterfly Painting: Watercolor Monarch Step-by-Step Tutorial
Mar 25, 24 03:39 PM
 Get creative with an easy butterfly painting tutorial. Discover the joy of drawing and painting a vibrant Monarch Butterfly with simple watercolor techniques.
 -
Overcoming an Artist's Block
Mar 15, 24 12:00 PM
 How to survive an artist's block. All artists can have blocks or delays, but we get over it.
What is an art block? How do we get started painting again?
How to survive an artist's block. All artists can have blocks or delays, but we get over it.
What is an art block? How do we get started painting again?
Recent Articles
-
You Can Paint Butterfly Art!
Unlock your creativity and start painting butterfly art. Discover the techniques of painting realistic butterflies. Link to 5 different pages on how to paint butterflies with tips and valuable insight… -
Learning to Paint
Learning to paint is fun! Millions of people are painting and you can too!
Use these five easy things to jump start your painting journey. -
Easy Butterfly Painting: Watercolor Monarch Step-by-Step Tutorial
Get creative with an easy butterfly painting tutorial. Discover the joy of drawing and painting a vibrant Monarch Butterfly with simple watercolor techniques. -
Overcoming an Artist's Block
How to survive an artist's block. All artists can have blocks or delays, but we get over it.
What is an art block? How do we get started painting again?